DIY Water Softener Installation: Complete Step-by-Step Guide
Save Money
DIY installation can save you hundreds of dollars compared to professional installation services
Basic Tools Required
Most installations only require common household tools and basic plumbing knowledge
Satisfaction Guaranteed
Successfully installing your own system provides a sense of accomplishment and understanding of your equipment
Recommended Water Softener Products
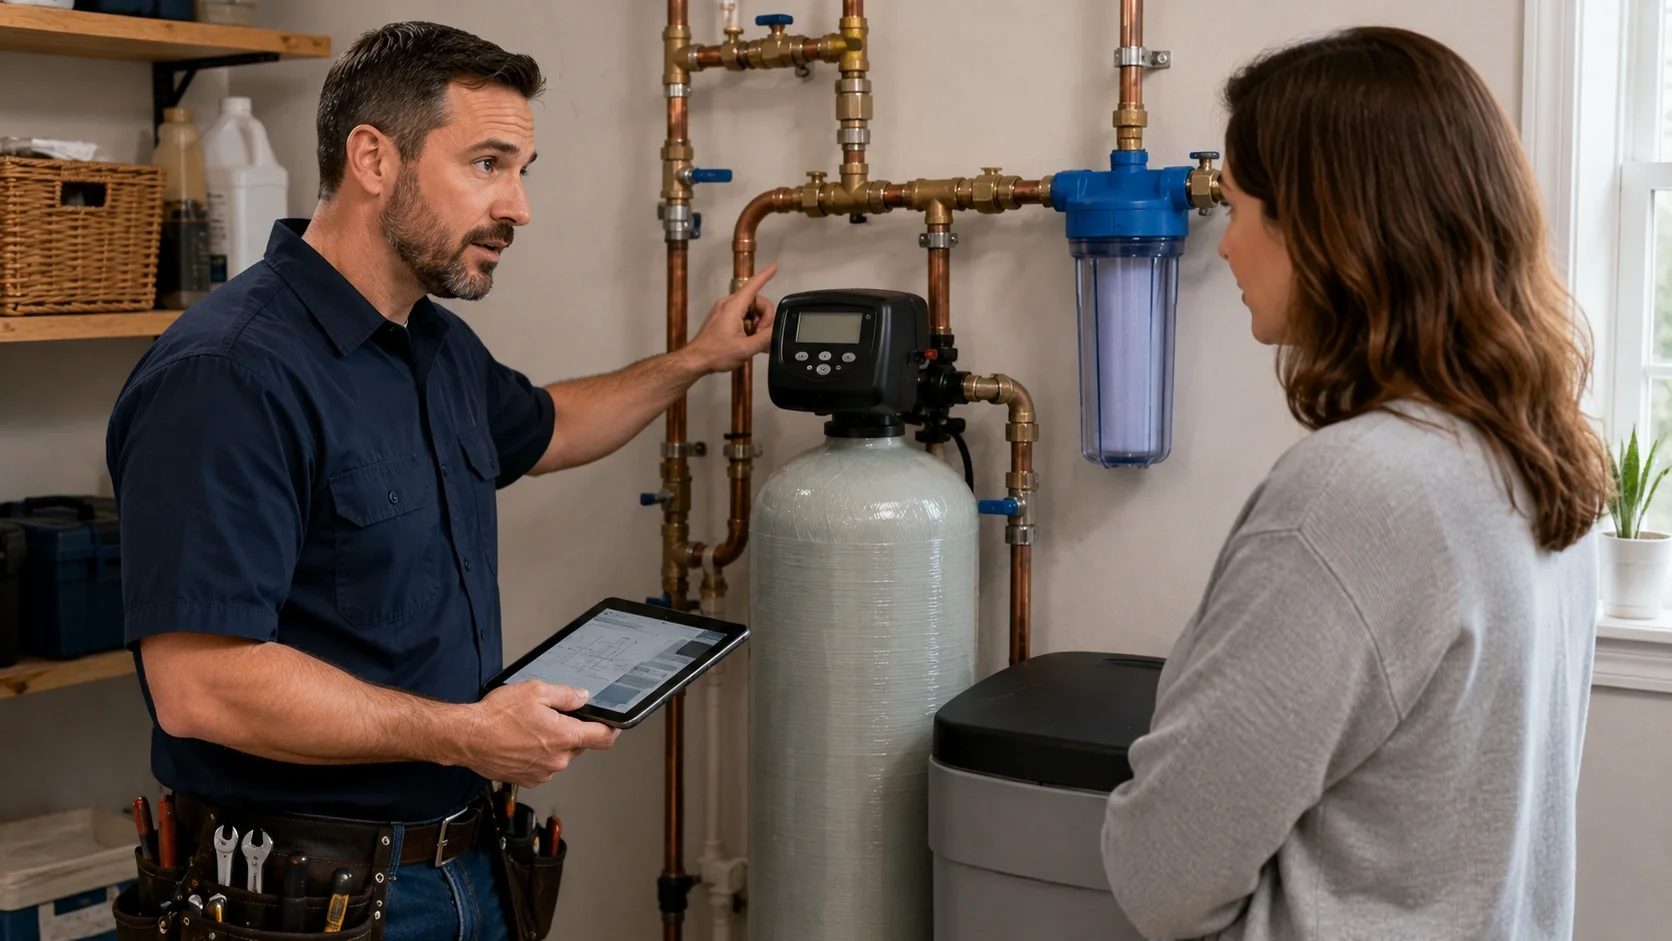
Introduction to DIY Water Softener Installation
Installing a water softener is an excellent way to protect your plumbing system, improve water quality, and extend the life of your water-using appliances. While professional installation can cost several hundred dollars, a DIY approach can save you significant money while giving you a better understanding of your home's water system.
This comprehensive guide will walk you through the entire process of installing a water softener yourself. With careful planning, the right tools, and attention to safety, most homeowners with basic plumbing skills can successfully complete this project over a weekend.
Cost Comparison:
- Professional Installation: $400-$1,200
- DIY Installation: $50-$150 (tools and materials)
- Potential Savings: $350-$1,050
DIY installation is one of the best ways to maximize your return on investment for a water softener system.
Tools and Materials Needed
Before You Start: Preparation
Proper preparation is crucial for a successful water softener installation. Before beginning, take the following steps:
Check Compatibility
Ensure your plumbing system is compatible with a water softener. Most homes with copper, PEX, or CPVC piping can accommodate a water softener, but you may need different connection methods depending on your pipe material.
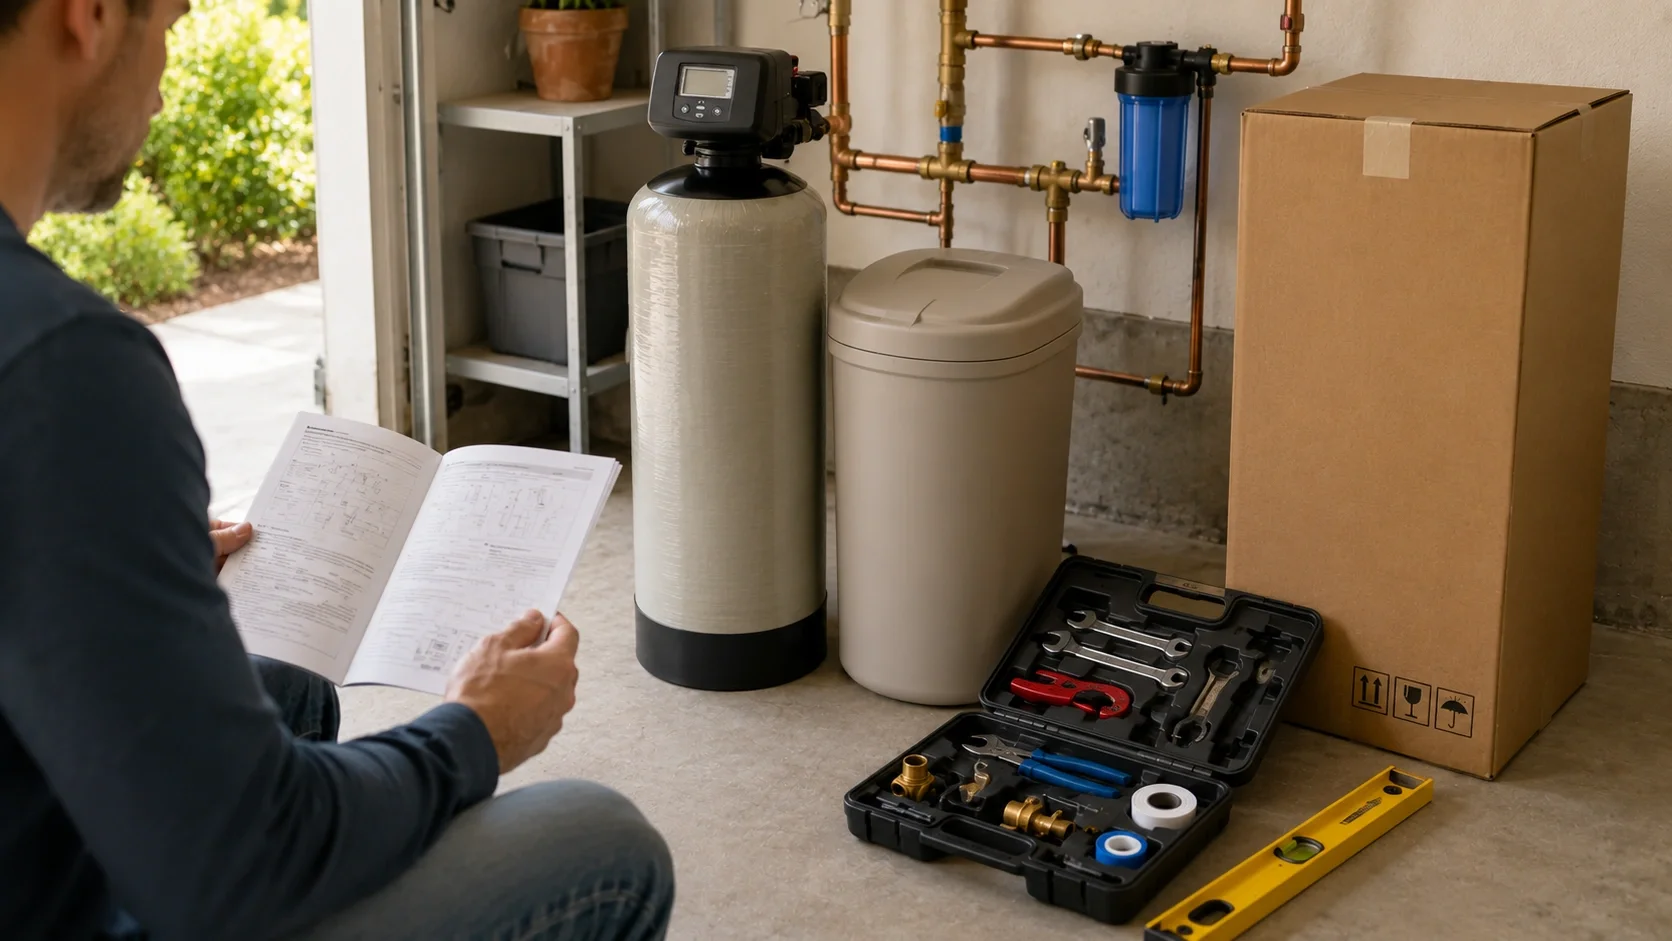
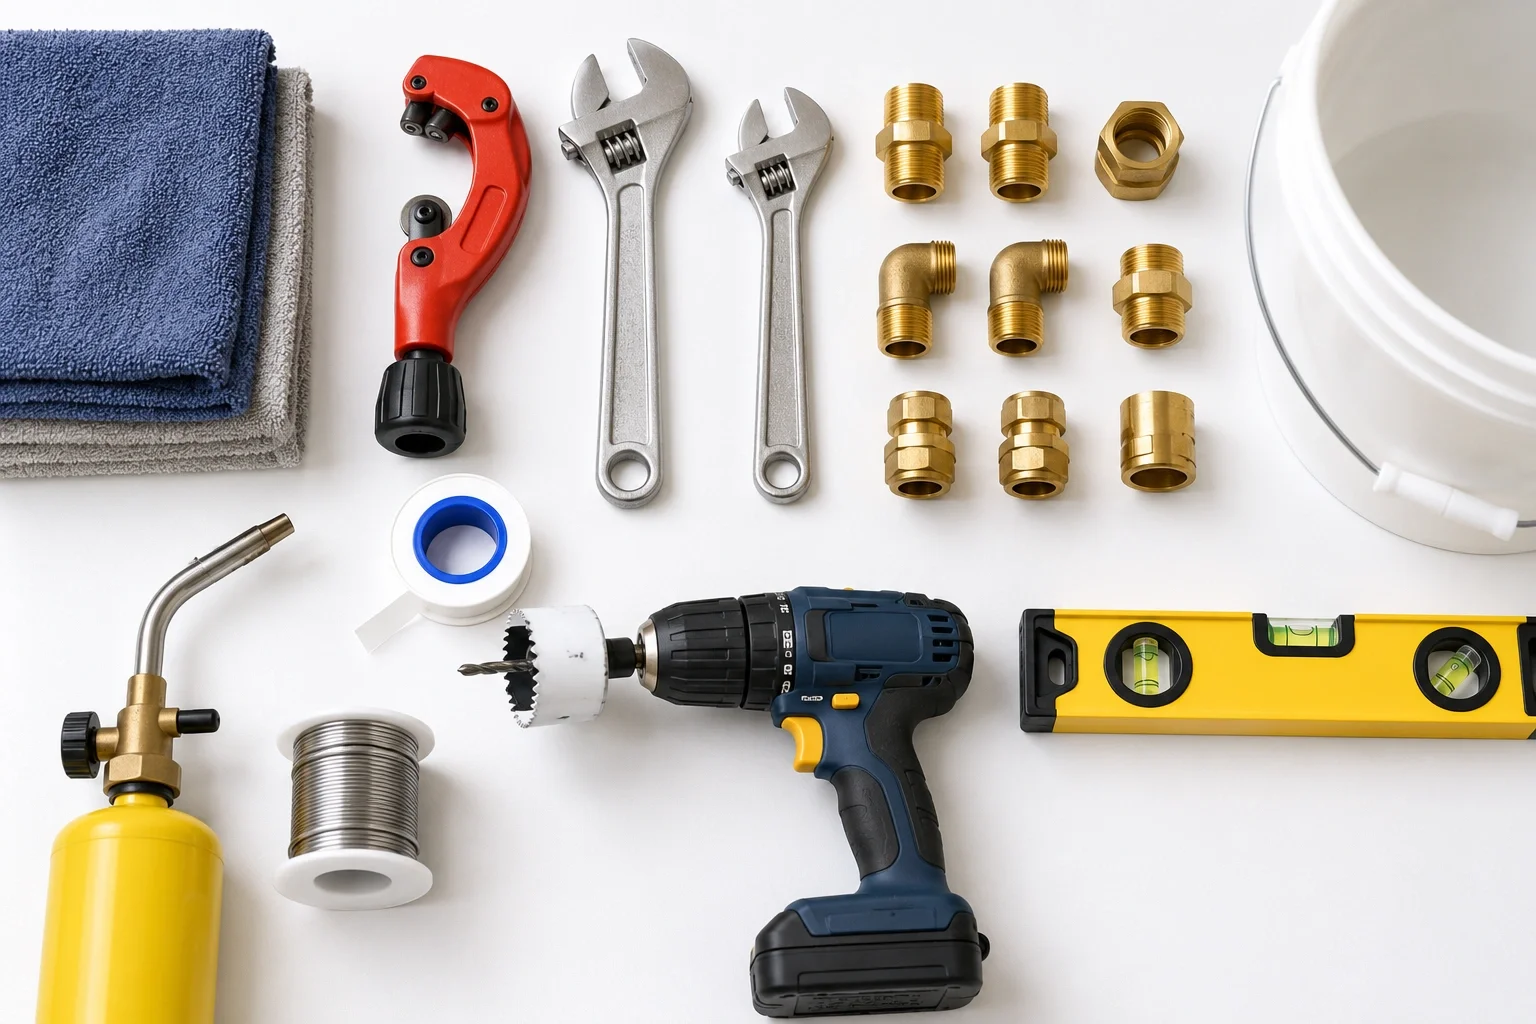
Gather Tools and Materials
You'll need the following tools and materials:
- Pipe cutter or hacksaw
- Adjustable wrenches
- Pipe fittings (appropriate for your pipe type)
- Teflon tape or pipe thread compound
- Soldering equipment (for copper pipes)
- Drill and hole saw (if needed for drain line)
- Level
- Bucket and towels
Read the Manual
Thoroughly read the manufacturer's installation manual before beginning. Each system may have specific requirements or recommendations that are important for proper operation and warranty compliance.
Assess Your Skill Level
✓ You Can DIY If
- You have basic plumbing knowledge
- You're comfortable using hand tools
- You can identify different pipe types
- You understand water shut-off procedures
- You're patient and detail-oriented
⚠ Call a Pro If
- You have complex plumbing configurations
- You're uncomfortable with plumbing work
- You have unusual pipe materials
- You're unsure about local codes
- You've had previous water damage issues
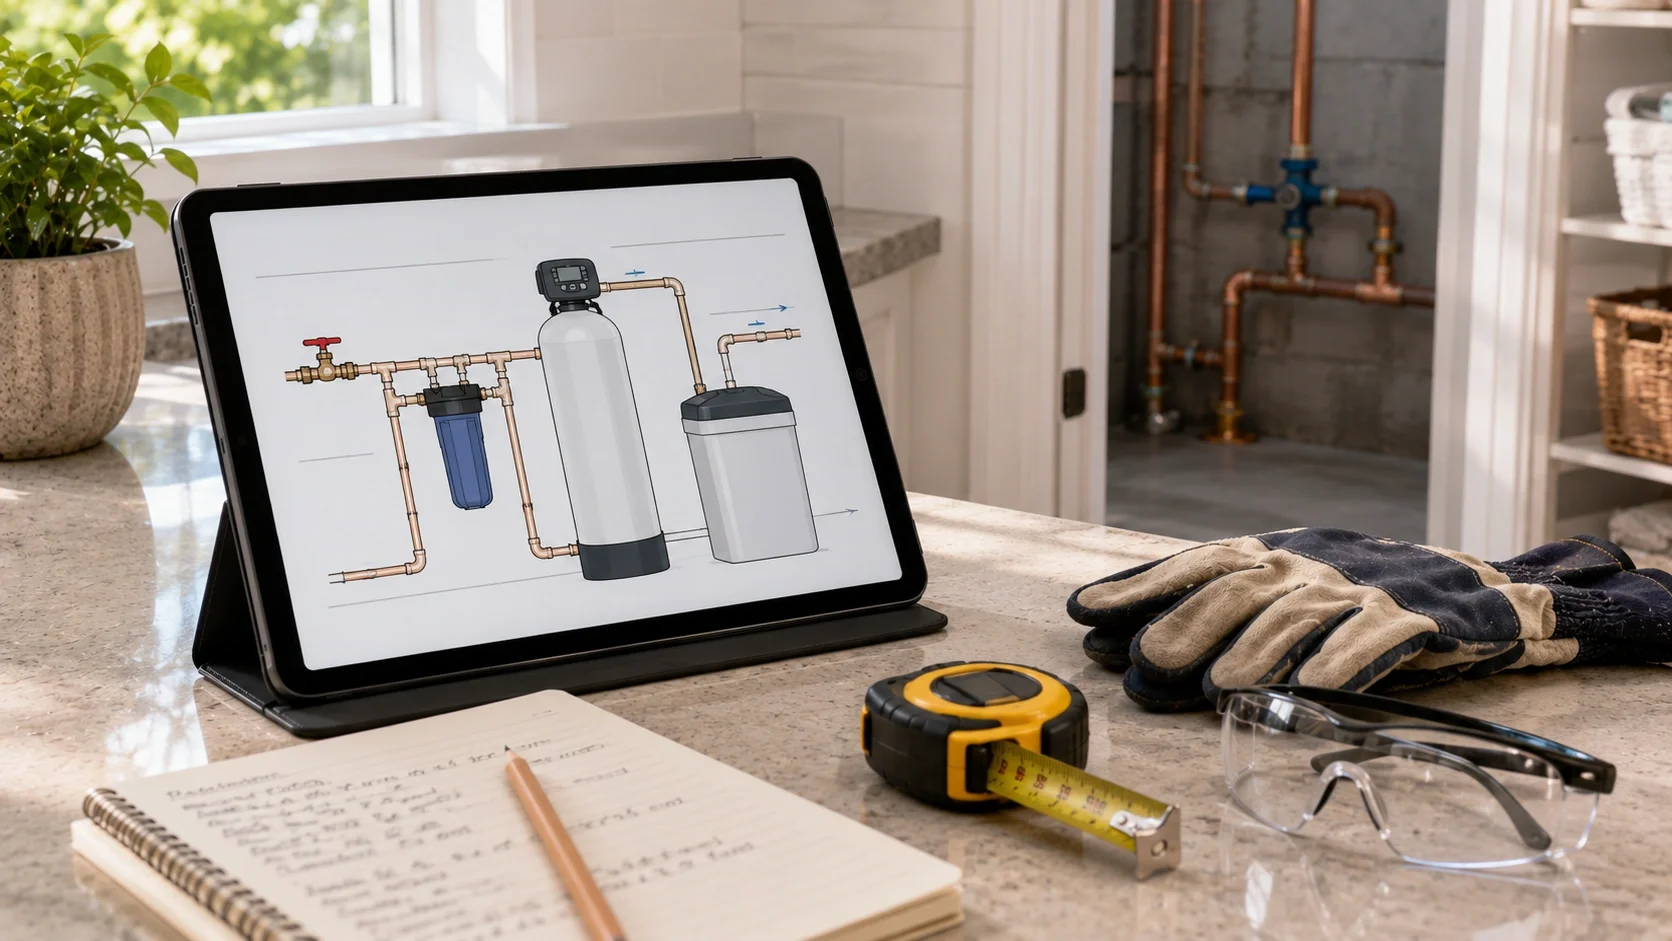
Choosing the Right Installation Location
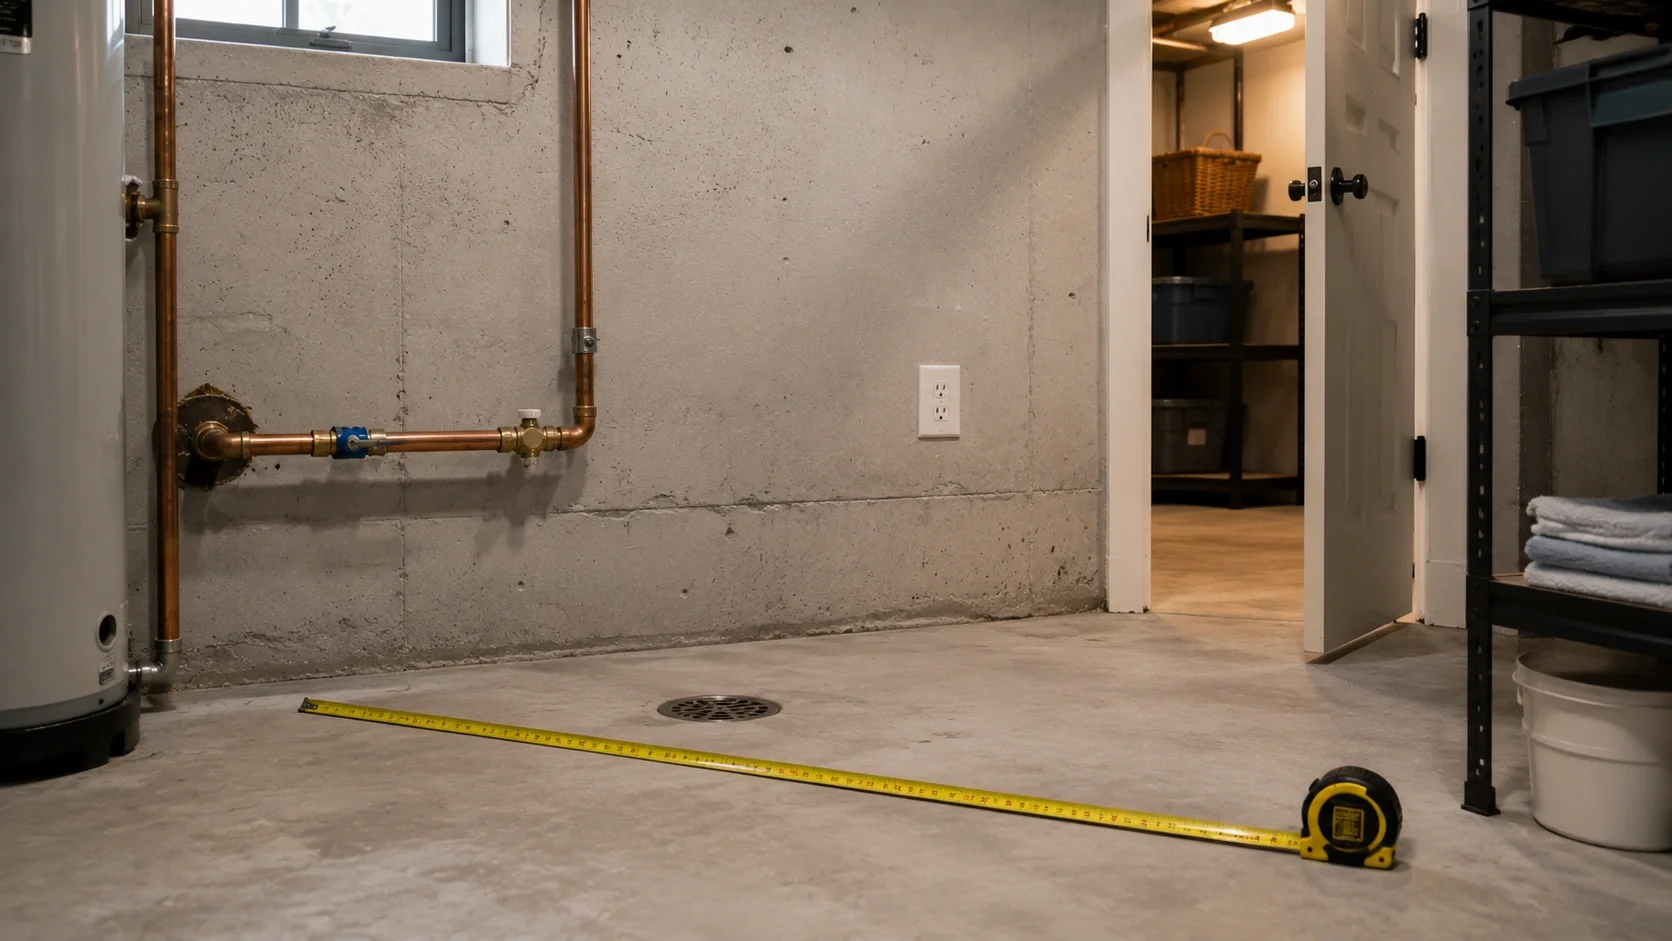
Selecting the proper location for your water softener is critical for both performance and maintenance accessibility. Consider these factors:
Proximity to Main Water Line
Install the softener as close as possible to where the main water supply enters your home. This ensures all water flowing into your home is treated.
Drain Access
The system needs access to a drain for the backwash cycle. A floor drain, utility sink, or standpipe within 20 feet is ideal.
Power Source
If your system is electric, ensure there's an accessible grounded outlet nearby. Never use an extension cord for water softener installation.
Adequate Space
Allow enough space around the unit for maintenance and salt replenishment. Most manufacturers recommend at least 12 inches of clearance on all sides.
Temperature Considerations
Install your softener in a location that won't freeze. Garages and basements are common locations, but ensure the area stays above freezing temperatures.
Ideal Location Checklist:
- ☑ Near main water line entry point
- ☑ Within 20 feet of a drain
- ☑ Near a grounded electrical outlet
- ☑ At least 12 inches clearance on all sides
- ☑ Temperature stays above 40°F (4°C)
- ☑ Level, stable surface
- ☑ Easy access for maintenance
Step-by-Step Installation Guide
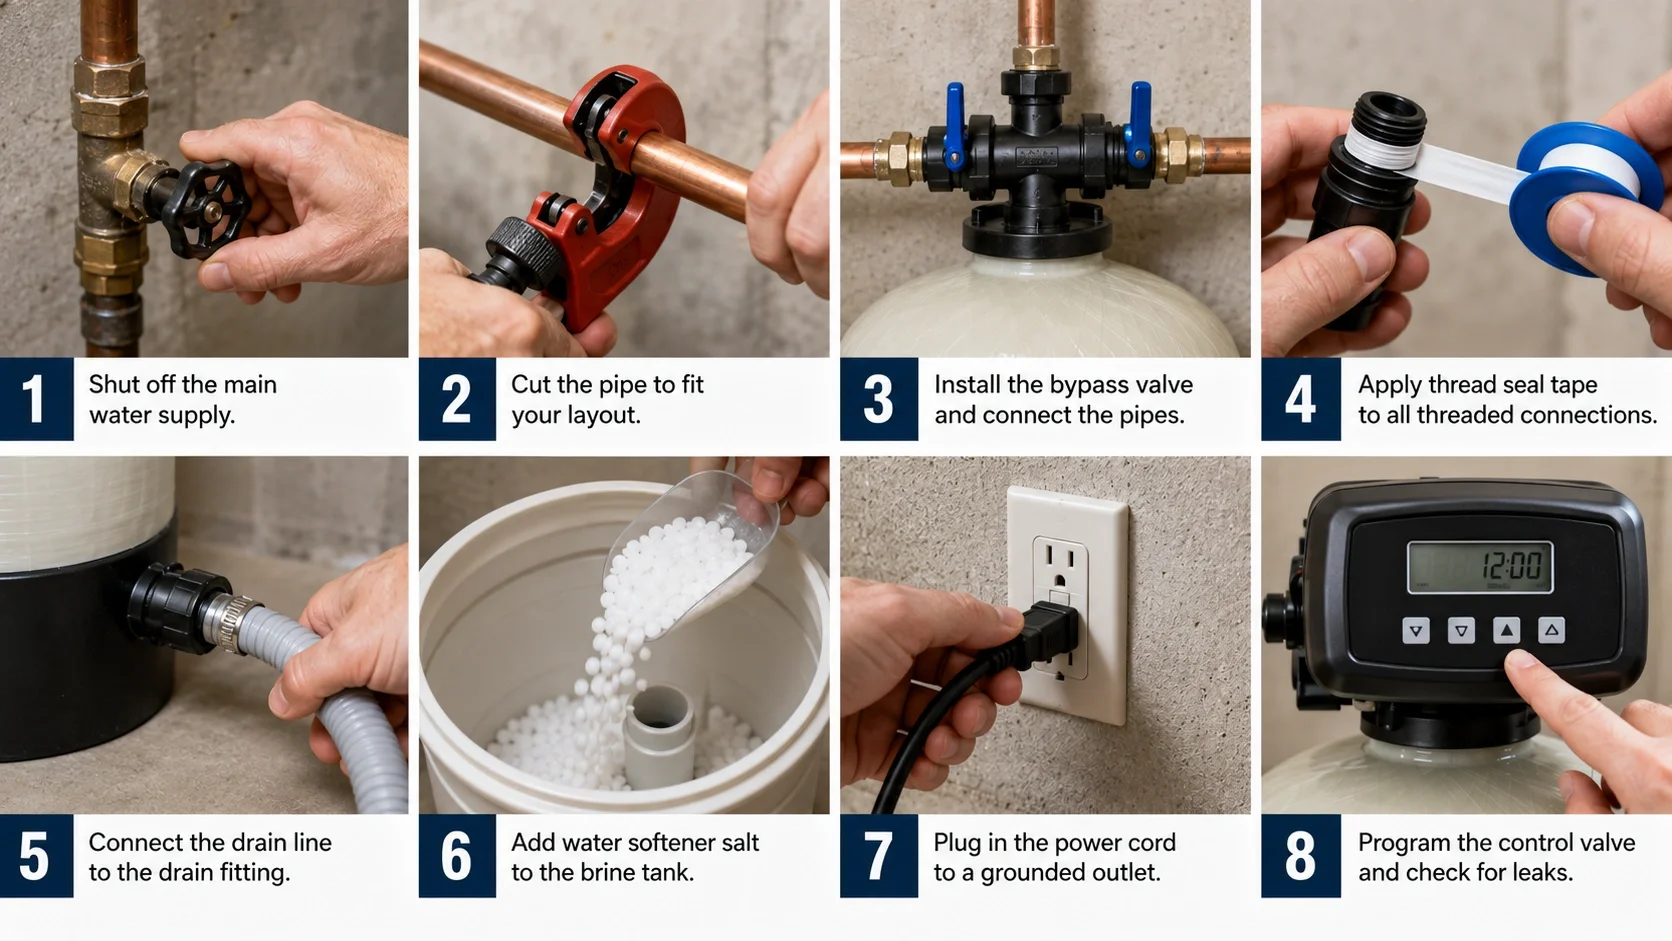
1 Shut Off Water Supply
Begin by turning off the main water supply to your home. Open faucets at the highest and lowest points in your home to drain remaining water from the pipes and relieve pressure.
⚠ Safety First2 Cut into the Main Water Line
Identify the section of pipe where you'll install the softener. Use a pipe cutter to make clean, straight cuts. If working with copper pipes, drain any remaining water completely before soldering.
💡 Pro Tip3 Install Bypass Valve
Most water softeners come with a bypass valve. Install this according to manufacturer instructions. The bypass valve allows you to temporarily route water around the softener for maintenance or if the system fails.
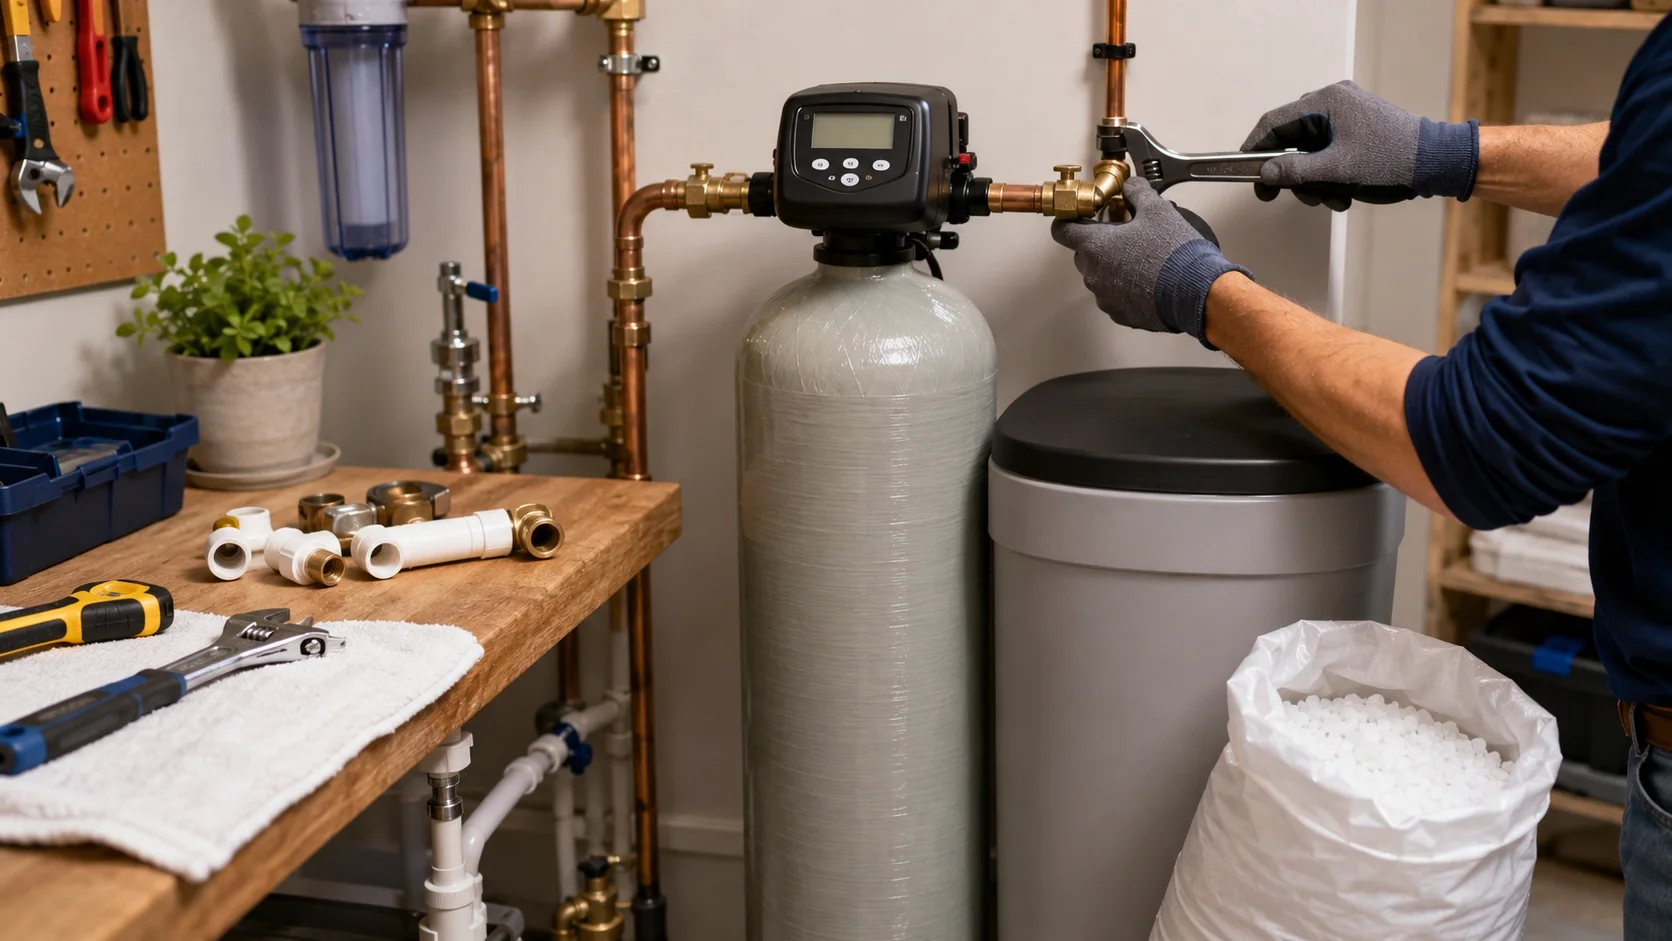
💡 Essential4 Connect Inlet and Outlet Pipes
Connect the water softener to your plumbing system using appropriate fittings. Use Teflon tape or pipe thread compound on all threaded connections to prevent leaks. Ensure the inlet and outlet are correctly connected according to the manufacturer's labels.
⚠ Check Direction5 Install Drain Line
Connect the drain line to the control valve. Run this line to your drain point, ensuring it maintains an downward slope without kinks or sharp bends. Most codes require an air gap to prevent backflow typically achieved by having the drain line terminate above the drain point.
💡 Slope Downward6 Set Up Brine Tank
Position the brine tank next to the mineral tank. Connect the brine line between the two tanks according to manufacturer instructions. Fill the brine tank with water softener salt or potassium chloride as recommended.
💡 Use Quality Salt7 Electrical Connection
If your system requires power, plug it into a grounded outlet. Do not use an extension cord. Program the control head according to your water hardness level and household size, following the manufacturer's instructions.
⚠ Grounded Outlet Only8 Start the System
Slowly turn the main water supply back on. Open the bypass valve to allow water to flow through the softener. Check all connections for leaks. Initiate a manual regeneration cycle to flush the system and activate the resin beads.
💡 Check for LeaksSafety Tips & Warnings
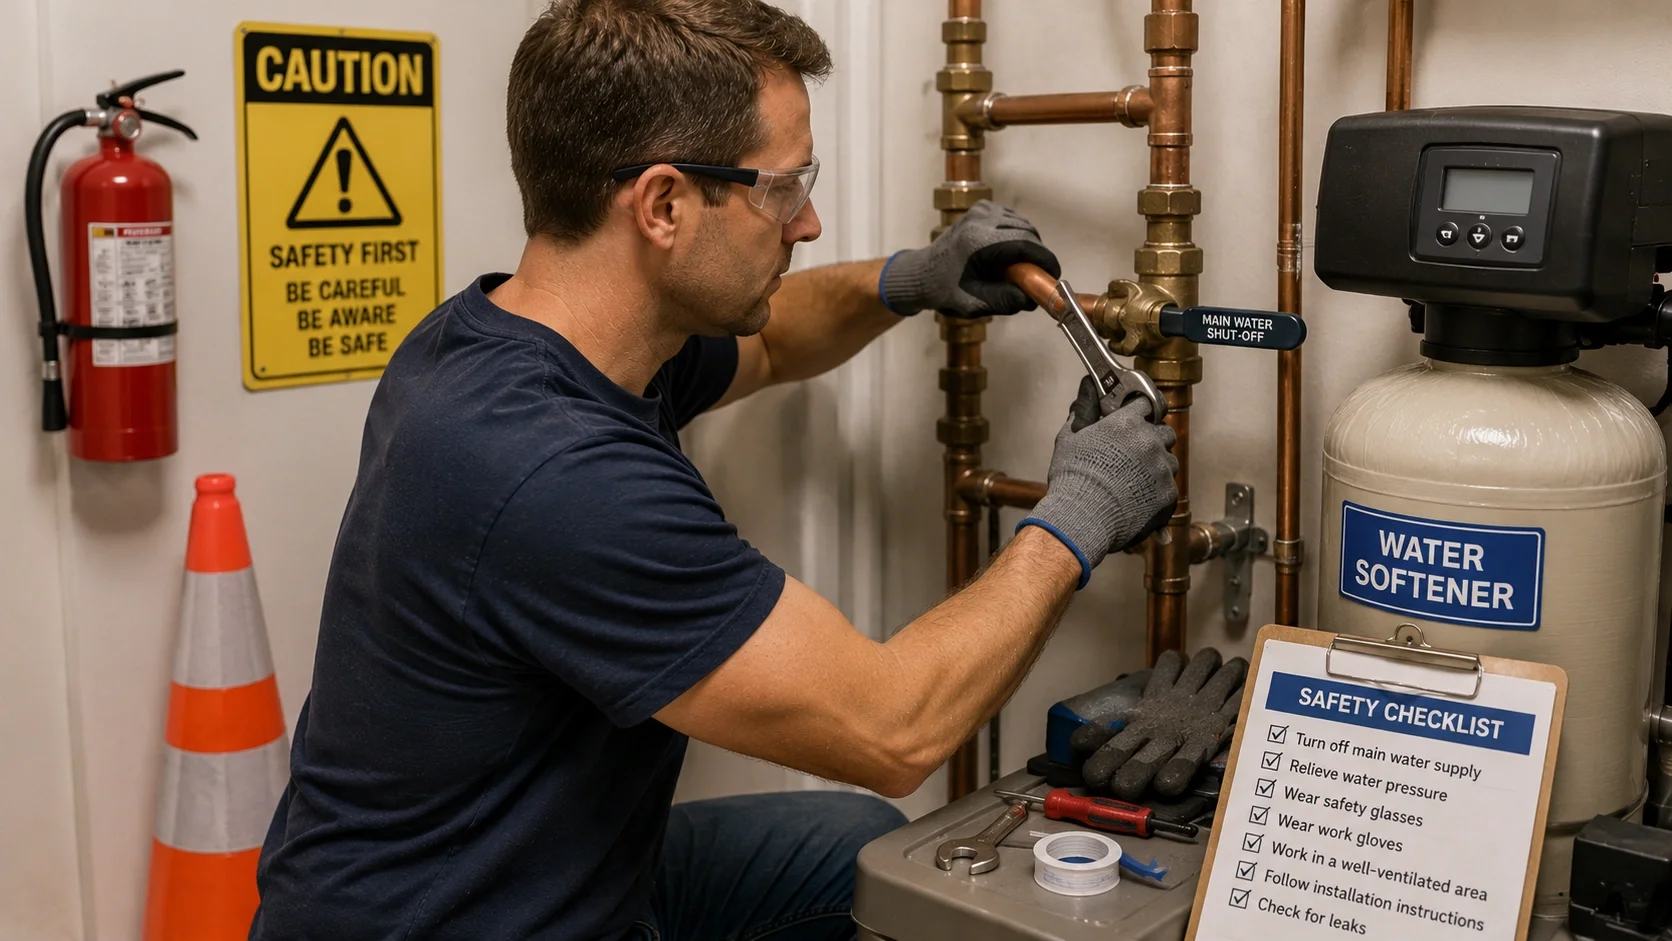
⚠ Important Safety Precautions
- Always shut off water supply before cutting into pipes
- Use proper eye protection when cutting or soldering
- Never use extension cords for water softener power connections
- Support heavy pipes to prevent stress on connections
- Check for gas lines before drilling or cutting
- Use Teflon tape correctly – wrap in the direction of the threads
- Test all connections for leaks before leaving the area
- Know where your main shut-off valve is in case of emergency
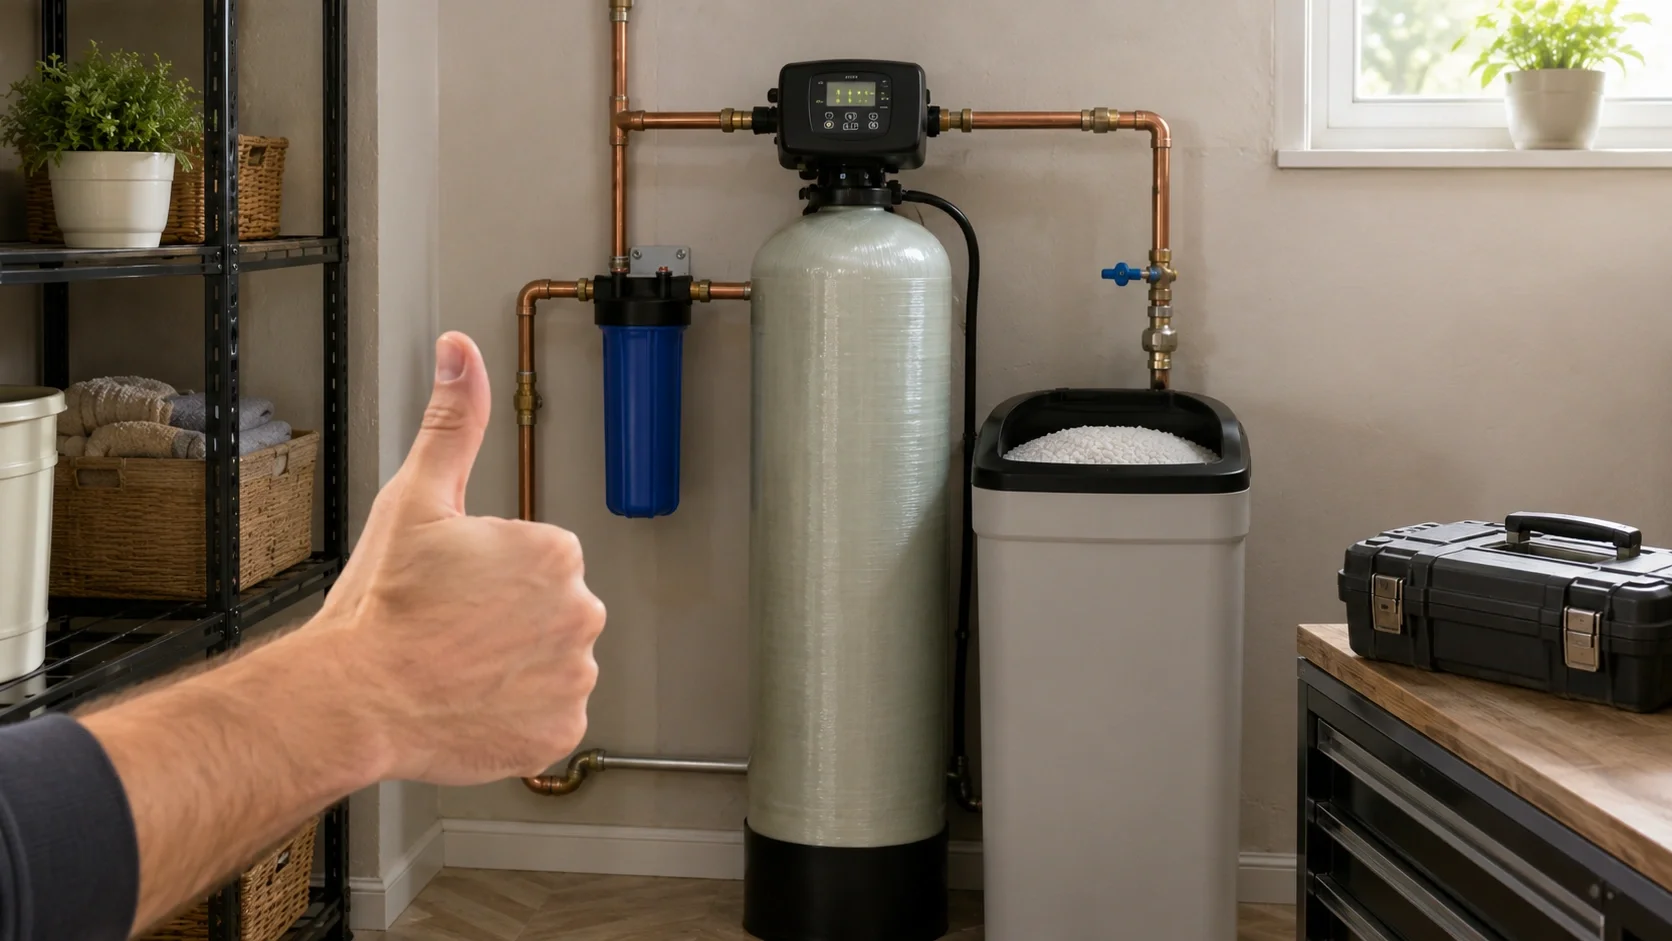
✅ Signs of a Successful Installation
- No leaks at any connection point
- System regenerates properly
- Water pressure remains consistent
- Water hardness test shows improvement
- Salt dissolves properly in the brine tank
- No unusual noises during operation
Testing and Maintenance
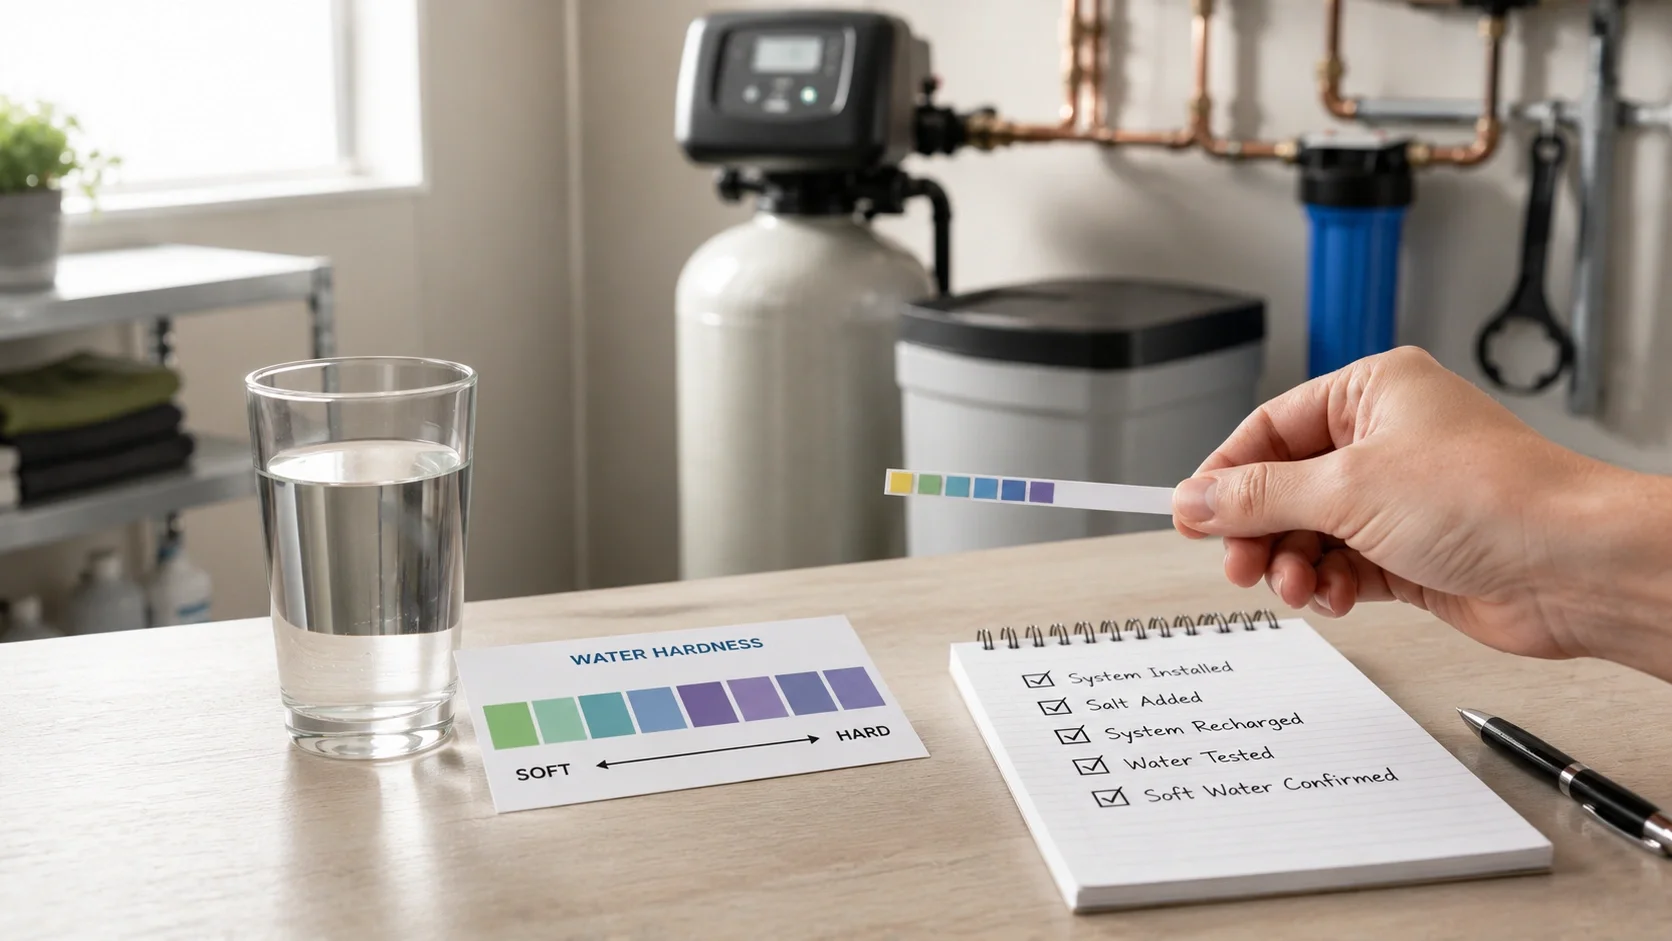
Testing Water Hardness
After installation, test your water hardness to ensure the system is working properly. Test kits are available at most hardware stores, or you can use test strips specifically designed for softened water.
Regular Maintenance
To keep your water softener functioning optimally:
- Check salt levels monthly and refill as needed
- Clean the brine tank annually
- Inspect for salt bridging (hard crust that prevents salt from dissolving)
- Check for leaks or unusual noises during regeneration
- Test water hardness periodically to ensure proper operation
Maintenance Schedule
- Monthly: Check salt levels, inspect for salt bridging
- Quarterly: Test water hardness, check for leaks
- Annually: Clean brine tank, inspect all connections
- Every 2-3 Years: Professional system inspection
- Every 10-15 Years: Consider resin bead replacement
When to Call a Professional
While many homeowners can successfully install a water softener, some situations warrant professional assistance:
- Complex plumbing configurations that require significant replumbing
- Persistent leaks that you can't resolve
- Significant water pressure drop after installation
- Electrical issues with the control system
- Uncertainty about local plumbing codes
- If you're uncomfortable with any aspect of the installation process
Remember that improper installation can void warranties and potentially cause water damage. When in doubt, consult a professional plumber.
Professional vs DIY: Quick Comparison
| Factor | DIY Installation | Professional Installation |
|---|---|---|
| Cost | $50-$150 | $400-$1,200 |
| Time Required | 4-8 hours | 2-4 hours |
| Skill Level | Basic plumbing | Expert |
| Warranty Protection | Limited | Full |
| Code Compliance | Research required | Guaranteed |
Frequently Asked Questions
Is DIY water softener installation difficult?
With basic plumbing skills and the right preparation, most homeowners can successfully install a water softener. The process is straightforward but requires careful attention to detail.
How long does installation take?
A typical DIY installation takes 4-8 hours, depending on your plumbing configuration and experience level. Plan for a full weekend day to complete the project.
What happens if I make a mistake?
Most mistakes are fixable. Common issues include leaks at connections (can be fixed with additional tightening or Teflon tape) and incorrect plumbing orientation. If you're unsure, consult a professional.
Do I need a permit to install a water softener?
Some municipalities require permits for water softener installation. Check with your local building department before starting your project.
Can I install a water softener in a rental property?
Check with your landlord before installing. Some properties may have restrictions, and you may need professional installation to maintain insurance coverage.
What tools do I need for DIY installation?
You'll need a pipe cutter, adjustable wrenches, pipe fittings, Teflon tape, a level, and a drill. Specific tools may vary based on your pipe material (copper, PEX, or PVC).
Final Installation Checklist

✅ Before You Start
- Read manufacturer's manual
- Gather all tools and materials
- Check local plumbing codes
- Verify system compatibility
- Plan the installation route
- Measure available space
✅ During Installation
- Shut off main water supply
- Drain pipes completely
- Install bypass valve correctly
- Connect inlet and outlet properly
- Install drain line with proper slope
- Set up brine tank with salt
- Make electrical connections safely
✅ After Installation
- Check all connections for leaks
- Test water hardness
- Run manual regeneration cycle
- Program control settings
- Schedule regular maintenance
- Keep records of installation
Conclusion
Installing a water softener is a worthwhile investment that can protect your plumbing, improve water quality, and make cleaning easier throughout your home. While the installation process requires careful planning and attention to detail, many homeowners can successfully complete it themselves with the right guidance.
Remember that proper maintenance is key to keeping your water softener operating efficiently for years to come. Regular checks of salt levels, occasional cleaning of the brine tank, and periodic testing of water hardness will ensure your system continues to provide the benefits of soft water.
If you encounter challenges during installation or are uncomfortable with any aspect of the process, don't hesitate to consult a professional plumber. The initial investment in proper installation will pay dividends in the long-term performance and reliability of your water softening system.
Final Tips for Success
- Take your time – Rushing leads to mistakes
- Double-check connections before turning water back on
- Keep the manual handy for reference during installation
- Don't hesitate to call for help if you get stuck
- Enjoy the benefits of soft water once installed!
Other Water Softener Resources
Explore these additional resources to learn more about water softening solutions:
Culligan Water Softener Systems
Discover Culligan's range of reliable water softening solutions with advanced features for different household needs.
Water Softener Salt Guide
Learn about different types of water softener salt and how to choose the right one for your system and water conditions.
Water Softener Systems Comparison
Compare different types of water softener systems to find the best solution for your home's specific water treatment needs.
A.O. Smith Water Softeners
Explore A.O. Smith's efficient water softening systems known for their durability and innovative technology.
Fleck Water Softener Systems
Learn about Fleck's reliable control valves and water softening systems preferred by professionals and DIY enthusiasts.
Water Softener Filter Media
Understand the different types of filter media used in water softeners and how they affect system performance.